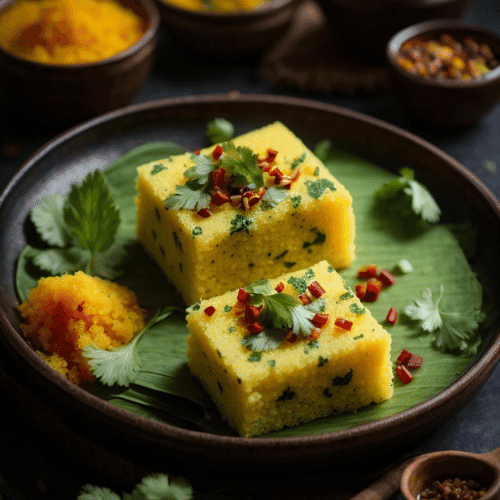
Best Dhokla Recipe Card
Make Batter: In a bowl, mix:
Besan (gram flour) – 1 cup
Semolina – 1 tsp
Turmeric powder – 1/2 tsp
Ginger green chili paste – 1 tsp
Lemon juice – 1 Tbsp
Sugar – 1 tsp
Salt – 1/2 tsp
Add 3/4 cup water and whisk until smooth.
Steaming:
Just before steaming, add fruit salt (Eno) – 1 tsp.
Pour batter into a greased dish and steam for 20 minutes.
Tempering:
Heat Oil – 1 Tbsp, and add:
Mustard Seeds – 1 tsp
Curry leaves – 8-10
Slit Green chilis -2
Asafoetida (Hing)- pinch
Pour tempering over slightly cooled dhokla.
What is Dhokla?
Dhokla is a traditional Indian dish that originates from the western state of Gujarat. Its history dates back several centuries, with roots in the diverse and rich culinary traditions of Gujarat. The dish was likely developed as a practical and nutritious meal, made using ingredients like fermented rice and chickpea (gram) flour, which were readily available in the region.
The fermentation process not only enhances the nutritional value of Dhokla but also gives it a light, spongy texture and a mildly tangy flavor. Over time, Dhokla has evolved, with various regional and modern variations emerging, such as Khaman Dhokla, which is made primarily with gram flour and is sweeter and softer than the traditional rice-based versions.
Dhokla has become a beloved snack across India and is now enjoyed worldwide, often served with chutneys or as part of a larger meal. Its versatility, ease of preparation, and healthy profile have contributed to its enduring popularity. This Khaman Dhokla recipe is easy and nutritious.
Difference between Dhokla and Khaman Dhokla
Dhokla and Khaman Dhokla are both popular Gujarati snacks, but they differ in ingredients, texture, and taste:
1. Ingredients:
- Dhokla: Traditionally made from a fermented batter of rice and split chickpeas (chana dal). This batter is soaked and fermented overnight, giving the dhokla a slightly tangy flavor.
- Khaman Dhokla: Made from gram flour (besan) instead of rice and dal. The batter is often quick-fermented using fruit salt (Eno) rather than the traditional overnight process.
2. Texture:
- Dhokla: Has a slightly denser and more coarse texture due to the combination of rice and dal.
- Khaman Dhokla: Lighter, softer, and spongier because of the use of gram flour and the quick fermentation process.
3. Color:
- Dhokla: Generally, a pale yellow or off-white color.
- Khaman Dhokla: Bright yellow due to the gram flour and turmeric.
4. Taste:
- Dhokla: Has a mildly tangy flavor due to the fermentation process.
- Khaman Dhokla: Sweeter and softer, often less tangy than traditional dhokla.
5. Preparation Time:
- Dhokla: Requires more preparation time due to the overnight fermentation.
- Khaman Dhokla: Quicker to prepare, as it often uses fruit salt to achieve the desired fluffiness.
In summary, while both are delicious, Dhokla is the more traditional, tangy, and dense version, whereas Khaman Dhokla is quicker to make, sweeter, and spongier.
Tips to make the best Khaman Dhokla Recipe
Here are some essential tips to ensure your Khaman Dhokla recipe turns out soft, spongy, and flavorful:
1. Use Fresh Ingredients:
- Ensure the gram flour (besan) is fresh and finely ground. Stale flour can affect the texture and taste.
- Use fresh fruit salt (Eno) for the best results. Old or expired fruit salt may not give the desired fluffiness.
2. Sift the Flour:
- Sift the gram flour to remove any lumps and ensure a smooth batter.
3. Batter Consistency:
- The batter should be of medium consistency—not too thick or too runny. It should pour smoothly but hold its shape.
- Gradually add water while mixing to achieve the right consistency.
4. Add Eno at the Right Time:
- Add fruit salt (Eno) just before steaming, and mix gently. Stirring too vigorously can cause the batter to lose its airiness.
- Once Eno is added, steam the batter immediately to retain the fluffy texture.
5. Proper Steaming:
- Preheat the steamer before placing the batter dish inside.
- Ensure the steamer is covered tightly to maintain consistent steam. If using a pressure cooker, don’t use the whistle.
- Steam on medium heat to cook evenly without drying out or becoming too dense.
6. Avoid Overcrowding:
- Don’t overcrowd the steamer; there should be enough space for steam to circulate around the dish.
7. Check for Doneness:
- After steaming for 15-20 minutes, check if the dhokla is done by inserting a toothpick in the center. If it comes out clean, it’s ready.
8. Tempering:
- Ensure the oil is hot before adding mustard seeds for tempering to enhance the flavors.
- Pour the tempering evenly over the dhokla to soak the flavors uniformly.
9. Cooling Before Cutting:
- Allow the dhokla to cool slightly before cutting. This helps in getting clean cuts without crumbling.
10. Serve Fresh:
- Khaman Dhokla is best enjoyed fresh and warm. If serving later, you can steam it lightly again to refresh its texture.
Following these tips will help you achieve soft, fluffy, and flavorful Khaman Dhokla recipe every time!
Check out our recipe cards for more delicious recipes
Dhokla – Soft and Delicious Recipe
4
servings30
minutes40
minutes300
kcalKeep the screen of your device on
Did you make this recipe?
Tag @recipibytes on Instagram and hashtag it with
Like this recipe?
Follow @recipibytes on Pinterest
Join our Facebook Group!
Follow RecipiBytes on Facebook

